Install metrics-server
metrics-server is the built-in resource usage metrics collection component of Kubernetes. You can automatically scale Pod copies horizontally for workload resources by configuring HPA policies.
This section describes how to install metrics-server .
Prerequisites
Before installing the metrics-server plugin, the following prerequisites need to be met:
-
Integrated the Kubernetes cluster or created the Kubernetes cluster, and you can access the UI interface of the cluster.
-
Created a namespace.
-
You should have permissions not lower than NS Editor. For details, refer to Namespace Authorization.
Steps
Please perform the following steps to install the metrics-server plugin for the cluster.
-
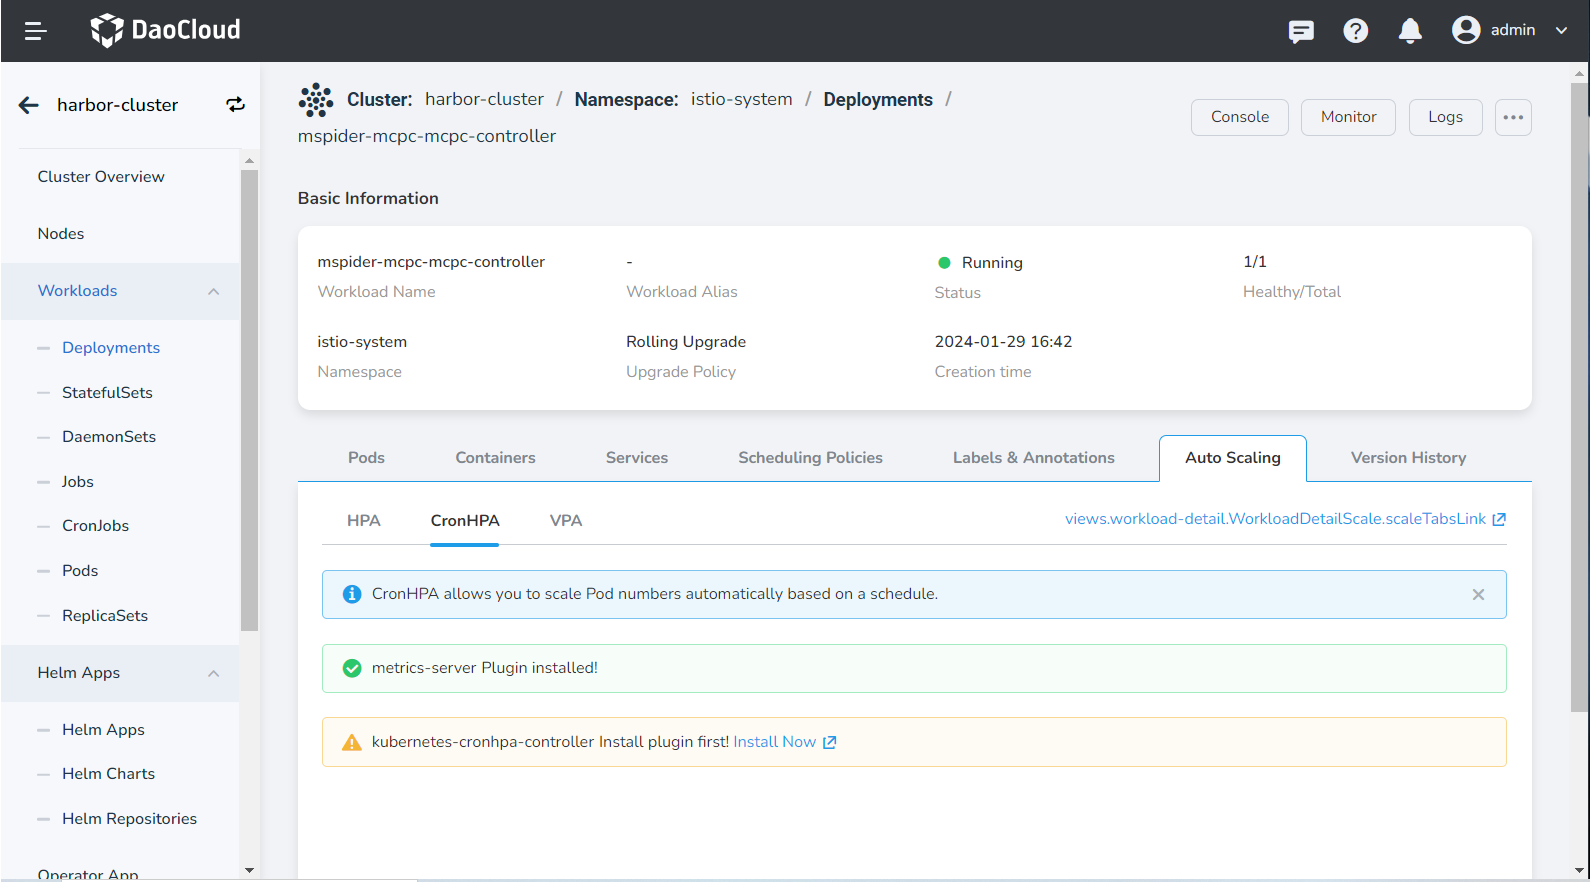
On the Auto Scaling page under workload details, click the Install button to enter the metrics-server plug-in installation interface.

-
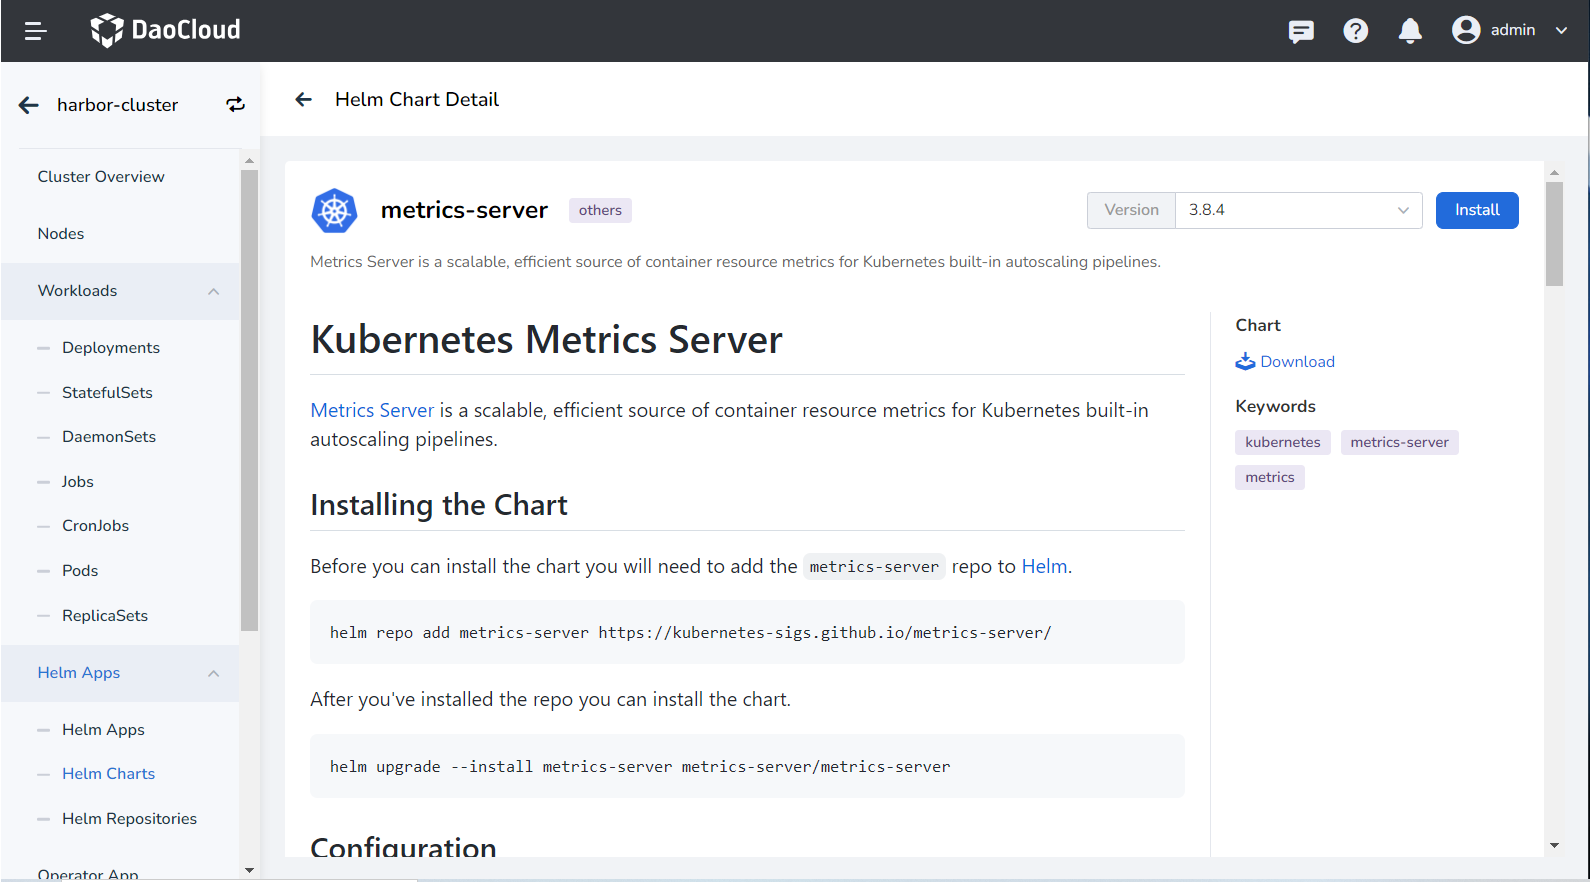
Read the introduction of the metrics-server plugin, select the version and click the Install button. This page will use the 3.8.2 version as an example to install, and it is recommended that you install 3.8.2 and later versions.

-
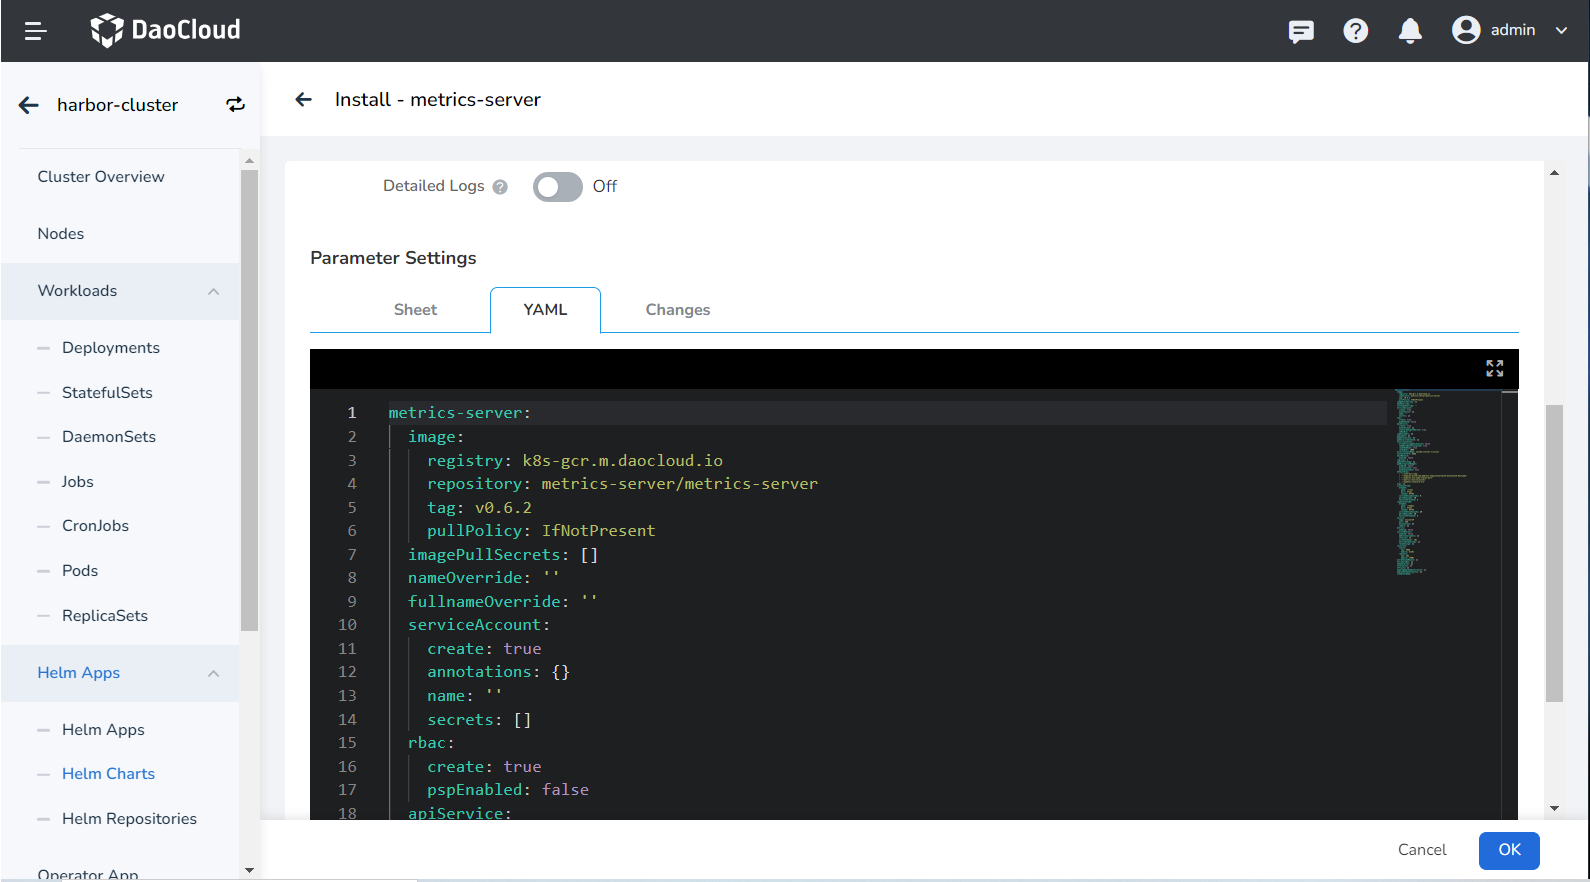
Configure basic parameters on the installation configuration interface.

- Name: Enter the plugin name, please note that the name can be up to 63 characters, can only contain lowercase letters, numbers and separators ("-"), and must start and end with lowercase letters or numbers, such as metrics-server-01.
- Namespace: Select the namespace for plugin installation, here we take default as an example.
- Version: The version of the plugin, here we take 3.8.2 version as an example.
- Ready Wait: When enabled, it will wait for all associated resources under the application to be ready before marking the application installation as successful.
- Failed to delete: After it is enabled, the synchronization will be enabled by default and ready to wait. If the installation fails, the installation-related resources will be removed.
- Verbose log: Turn on the verbose output of the installation process log.
Note
After enabling Wait and/or Deletion failed , it takes a long time for the app to be marked as Running .
-
Advanced parameter configuration
-
If the cluster network cannot access the k8s.gcr.io repository, please try to modify the repositort parameter to repository: k8s.m.daocloud.io/metrics-server/metrics-server .
-
An SSL certificate is also required to install the metrics-server plugin. To bypass certificate verification, you need to add - --kubelet-insecure-tls parameter at defaultArgs: .
Click to view and use the YAML parameters to replace the default YAML
image: repository: k8s.m.daocloud.io/metrics-server/metrics-server # Change the registry source address to k8s.m.daocloud.io tag: '' pullPolicy: IfNotPresent imagePullSecrets: [] nameOverride: '' fullnameOverride: '' serviceAccount: create: true annotations: {} name: '' rbac: create: true pspEnabled: false apiService: create: true podLabels: {} podAnnotations: {} podSecurityContext: {} securityContext: allowPrivilegeEscalation: false readOnlyRootFilesystem: true runAsNonRoot: true runAsUser: 1000 priorityClassName: system-cluster-critical containerPort: 4443 hostNetwork: enabled: false replicas: 1 updateStrategy: {} podDisruptionBudget: enabled: false minAvailable: null maxUnavailable: null defaultArgs: - '--cert-dir=/tmp' - '--kubelet-preferred-address-types=InternalIP,ExternalIP,Hostname' - '--kubelet-use-node-status-port' - '--metric-resolution=15s' - --kubelet-insecure-tls # Bypass certificate verification args: [] livenessProbe: httpGet: path: /livez port:https scheme: HTTPS initialDelaySeconds: 0 periodSeconds: 10 failureThreshold: 3 readinessProbe: httpGet: path: /readyz port:https scheme: HTTPS initialDelaySeconds: 20 periodSeconds: 10 failureThreshold: 3 service: type: ClusterIP port: 443 annotations: {} labels: {} metrics: enabled: false serviceMonitor: enabled: false additionalLabels: {} interval: 1m scrapeTimeout: 10s resources: {} extraVolumeMounts: [] extraVolumes: [] nodeSelector: {} tolerations: [] affinity: {} -
-
Click the OK button to complete the installation of the metrics-server plug-in, and then the system will automatically jump to the Helm Apps list page. After a few minutes, refresh the page and you will see the newly installed Applications.
Note
When deleting the metrics-server plugin, the plugin can only be completely deleted on the Helm Applications list page. If you only delete metrics-server on the workload page, this only deletes the workload copy of the application, the application itself is still not deleted, and an error will be prompted when you reinstall the plugin later.